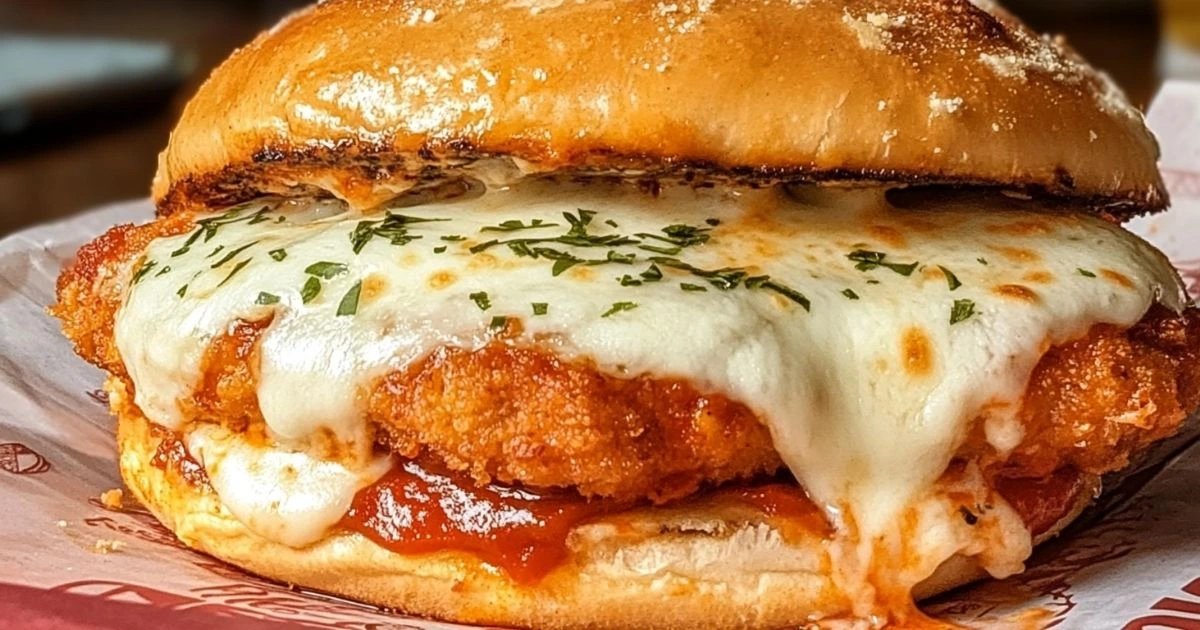
Stop dreaming about the perfect chicken parm sandwich – here’s how to make it at home that rivals any restaurant version. This isn’t just another chicken sandwich recipe; it’s a masterclass in achieving the perfect balance of crispy chicken, tangy tomato sauce, and melty cheese, all nestled between toasted Italian bread.
After testing dozens of variations in my kitchen, I’ve perfected a chicken parm sandwich that delivers perfectly crispy chicken, flavorful sauce, and the ideal cheese melt every single time. Whether you’re a chicken parmesan sandwich enthusiast or trying your first chicken parm sub, this recipe will become your new go-to comfort food.
In this comprehensive guide, you’ll discover my tested techniques for preparing the chicken, the perfect bread-to-filling ratio, sauce secrets, and assembly tricks that ensure each bite delivers that classic chicken parm experience you crave. Plus, I’ll share variations, storage tips, and answers to all your chicken parm sandwich questions.
Table of Contents
Why This Recipe Works (The “Secret Sauce”)
What makes this chicken parm sandwich superior to others? It’s all in the details:
- Double-dredging technique: Creates an exceptionally crispy coating that stays crunchy even after the sauce is added
- Seasoned breadcrumbs: The panko and Italian breadcrumb blend provides perfect texture and flavor
- Temperature control: Precise oil temperature ensures juicy chicken with a golden-brown exterior
- Sauce application method: Strategically applied to prevent sogginess while maximizing flavor
- Cheese combination: The perfect ratio of mozzarella and parmesan for optimal melt and flavor
- Bread selection: Sturdy Italian bread that’s toasted just enough to stand up to the fillings
These techniques are the culmination of years of testing and refining to create the ultimate chicken parm sandwich experience.
Ingredient Deep Dive
For the Chicken:
- 2 boneless, skinless chicken breasts (about 1 pound/450g)
- 1 cup (120g) all-purpose flour
- 1 teaspoon garlic powder
- 1 teaspoon salt
- ½ teaspoon black pepper
- 3 large eggs
- 2 tablespoons milk
- 1½ cups (150g) panko breadcrumbs
- ½ cup (50g) Italian seasoned breadcrumbs
- ½ cup (50g) grated Parmesan cheese
- 1 teaspoon dried oregano
- 1 tablespoon fresh parsley, finely chopped
- Vegetable or canola oil for frying (about 2 cups/480ml)
For the Sandwich:
- 1 cup (240ml) high-quality marinara sauce
- 8 slices fresh mozzarella cheese (about 8oz/225g)
- ¼ cup (25g) freshly grated Parmesan cheese
- 4 Italian sandwich rolls or ciabatta rolls
- 2 tablespoons butter, softened
- 2 cloves garlic, minced
- 1 tablespoon fresh basil, chopped (for garnish)
- Red pepper flakes (optional, for heat)

Ingredient Notes:
Chicken: I specifically chose chicken breasts for their classic appearance and even cooking. You can substitute chicken thighs for juicier meat, but you’ll need to adjust cooking time.
Breadcrumbs: The combination of panko and Italian breadcrumbs creates the perfect texture – panko for crispiness and Italian breadcrumbs for flavor and color. For gluten-free options, use gluten-free panko and breadcrumbs.
Cheese: Fresh mozzarella provides that stretchy, gooey melt while low-moisture mozzarella offers better structural stability. I recommend using a combination for the best results. The Parmesan adds a savory depth that completes the flavor profile.
Bread: Italian sandwich rolls or ciabatta have the perfect sturdy structure to hold up to sauce and fillings without falling apart. For a softer option, try hoagie rolls, but be sure to toast them well.
Marinara: While homemade is always best, a high-quality jarred marinara works well too – look for one with minimal ingredients and no added sugar.
Equipment Needed
- Meat mallet or rolling pin
- 3 shallow bowls for breading station
- Deep heavy-bottomed pan or Dutch oven for frying
- Cooking thermometer
- Tongs
- Wire cooling rack set over a baking sheet
- Cast iron skillet or oven-safe pan for melting cheese
- Serrated knife for cutting bread
- Instant-read meat thermometer (optional but recommended)
Step-by-Step Instructions
Prepare the Chicken
- Butterfly the chicken breasts by slicing horizontally through the middle, creating two thinner pieces from each breast (4 pieces total).
- Pound the chicken between sheets of plastic wrap to an even ½-inch thickness. This ensures even cooking and tender meat.
- Season each piece with salt and pepper on both sides.
Set Up Your Breading Station
- Prepare three shallow dishes: In the first, combine flour, garlic powder, salt, and pepper. In the second, whisk eggs with milk. In the third, mix panko, Italian breadcrumbs, Parmesan, oregano, and parsley.
- Dredge each chicken piece first in the flour mixture, shaking off excess.
- Dip into the egg wash, allowing excess to drip off.
- Press firmly into breadcrumb mixture, ensuring an even coating on both sides.
- Repeat the egg and breadcrumb steps for a double coating that guarantees extra crispiness.
- Place breaded chicken on a wire rack and let rest for 10 minutes. This helps the coating adhere better during frying.
Fry the Chicken
- Heat oil in a deep pan to 350°F (175°C). Use enough oil to come halfway up the sides of the chicken.
- Gently place chicken in the hot oil, being careful not to overcrowd the pan (work in batches if needed).
- Fry for 3-4 minutes per side until golden brown and crispy. Chicken should reach an internal temperature of 165°F (74°C).
- Transfer to a wire rack set over a baking sheet to drain excess oil. The rack prevents the bottom from getting soggy.
Prepare the Bread
- Preheat your broiler.
- Slice rolls in half and place cut-side up on a baking sheet.
- Mix butter with minced garlic and spread on cut sides of rolls.
- Toast under the broiler for 1-2 minutes until golden and crisp around the edges. Watch carefully to prevent burning!
Assemble the Sandwiches
- Warm marinara sauce in a small saucepan until heated through.
- Place fried chicken on the bottom half of each toasted roll.
- Spoon marinara sauce over each piece of chicken, using about 3-4 tablespoons per sandwich.
- Layer 2 slices of mozzarella on top of the sauce.
- Sprinkle with Parmesan cheese and a pinch of red pepper flakes if desired.
- Place under the broiler for 1-2 minutes until cheese is melted and bubbly.
- Sprinkle with fresh basil as soon as they come out of the broiler.
- Top with the other half of the roll and press gently.
- Cut sandwiches in half on a diagonal for the perfect cross-section view.

Pro Tips for Perfection
For Perfect Chicken:
- Temperature matters: Use a cooking thermometer to maintain oil at 350°F (175°C). Too hot and the coating burns before the chicken cooks; too cool and it becomes greasy.
- Don’t skip the rest: Letting the breaded chicken rest before frying helps the coating adhere better.
- Pat dry: Make sure to pat the chicken dry before starting the breading process.
- Work clean: Use one hand for wet ingredients and one for dry to avoid creating a gummy mess on your fingers.
For Perfect Assembly:
- Toast strategically: Toasting the bread creates a moisture barrier that prevents sogginess.
- Sauce control: Don’t oversauce! About 3-4 tablespoons per sandwich is perfect.
- Let it rest: Allow the assembled sandwich to rest for 1-2 minutes before cutting so the cheese can set slightly.
- Cut technique: Use a sharp serrated knife and cut with a gentle sawing motion to keep fillings intact.
Variations & Customizations
Baked Chicken Parm Sandwich
For a lighter version, place breaded chicken on a wire rack over a baking sheet. Spray with cooking oil and bake at 425°F (220°C) for about 15-20 minutes, flipping halfway, until golden and cooked through.
Air Fryer Chicken Parm
Spray breaded chicken with cooking oil and air fry at 380°F (193°C) for 10-12 minutes, flipping halfway. Continue with sandwich assembly as directed.
Spicy Chicken Parm Sandwich
Add 1 teaspoon of red pepper flakes to your breadcrumb mixture and use spicy marinara sauce. Top with pepper jack cheese alongside the mozzarella.
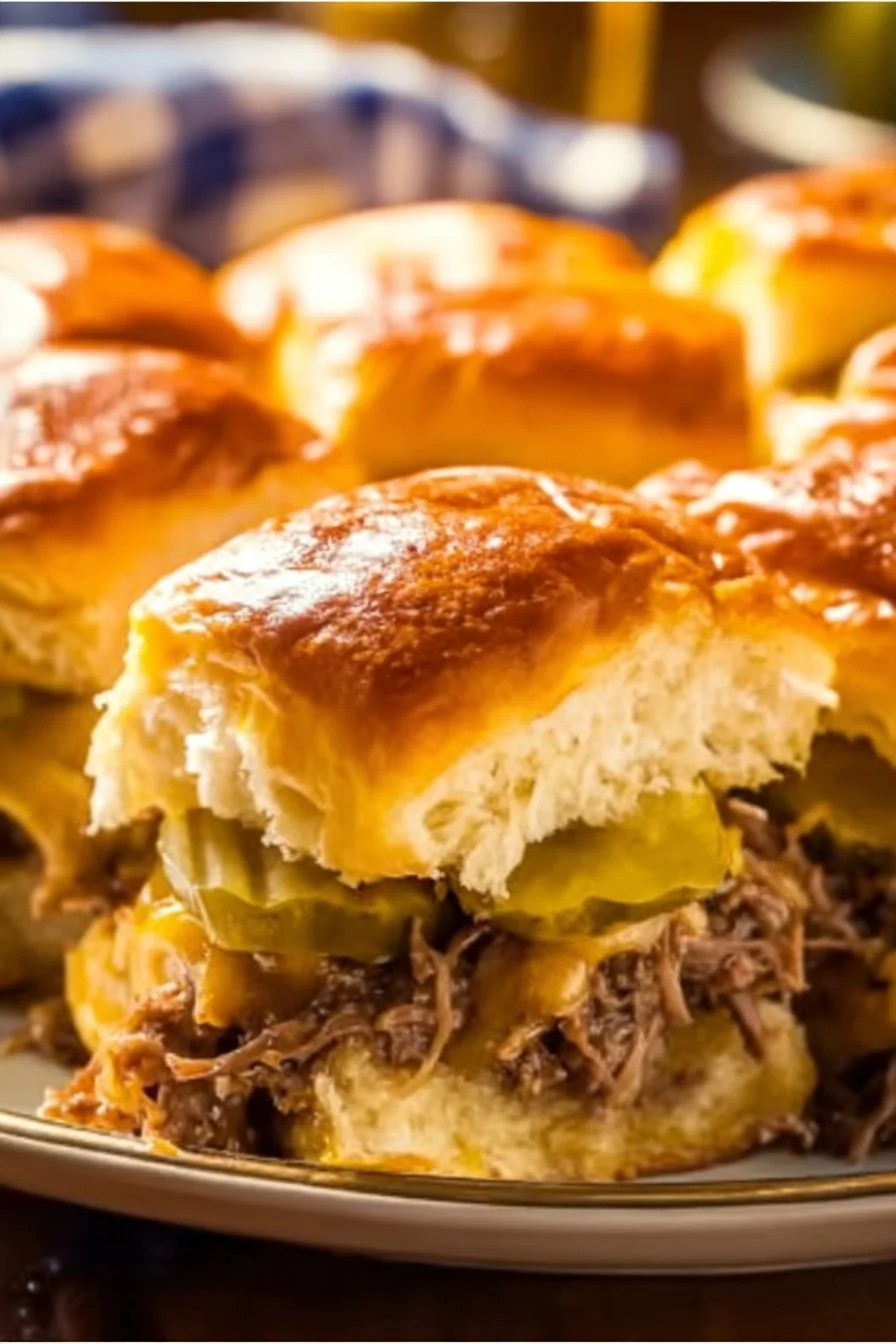
Chicken Parm Sliders
Use the same recipe but cut chicken into smaller pieces and use slider buns for perfect party-sized portions.
Eggplant Option
Replace chicken with ½-inch slices of eggplant for a vegetarian version. Salt eggplant slices and let sit for 30 minutes to draw out moisture before breading.
Serving Suggestions
This hearty chicken parm sandwich pairs perfectly with:
- Crispy Garlic Parmesan Fries: The ultimate indulgent pairing
- Simple Arugula Salad with Lemon Dressing: A bright, peppery contrast to the rich sandwich
- Roasted Italian Vegetables: For a healthier option that complements the Italian flavors
- Marinara Dipping Sauce: Extra sauce on the side for those who want more
Storage & Reheating Instructions
While chicken parm sandwiches are best enjoyed fresh, you can:
Store components separately:
- Keep fried chicken in an airtight container in the refrigerator for up to 3 days
- Store sauce separately
- Reheat chicken in a 350°F (175°C) oven for 8-10 minutes to restore crispiness before assembling sandwiches
For fully assembled leftovers:
- Wrap tightly in foil
- Reheat in a 350°F (175°C) oven for 10-15 minutes
- Remove foil for the last 2-3 minutes to re-crisp the bread
Avoid microwaving if possible, as it makes the breading soggy and the bread tough.

FAQ: Everything You Need to Know About Chicken Parm Sandwiches
Can I make chicken parm sandwiches ahead of time?
You can prepare the components ahead of time, but assembly is best done just before serving. The breaded chicken can be prepared and refrigerated for up to 24 hours before frying. For best results, store the fried chicken, sauce, and bread separately until ready to assemble.
Is chicken parm sandwich authentic Italian?
The chicken parm sandwich is technically Italian-American. While chicken parmesan (pollo alla parmigiana) has Italian roots, serving it on a sandwich is an American adaptation that became popular in Italian-American communities.
Can I use jarred marinara sauce?
Absolutely! Choose a high-quality jarred marinara for convenience. Rao’s, Mezzetta, and Michael’s of Brooklyn are excellent options that provide rich flavor without the need to make sauce from scratch.
How do I make this gluten-free?
Use gluten-free flour, breadcrumbs, and rolls or bread. Many grocery stores now carry these alternatives, and the recipe works just as well with these substitutions.
What’s the best cheese for chicken parm sandwiches?
A combination of fresh mozzarella for meltability and Parmesan for flavor is traditional. However, provolone or fontina can be excellent alternatives or additions to the cheese blend.
Can I grill these sandwiches instead of broiling?
Yes! You can assemble the sandwich with the fried chicken, sauce, and cheese, then grill it in a panini press or on a stovetop grill pan until the bread is toasted and the cheese melts.
How do I prevent my sandwich from getting soggy?
Toast the bread, don’t over-sauce, and if making ahead, keep components separate until ready to eat. You can also create a barrier by spreading a thin layer of mayonnaise on the bread before adding other ingredients.
Can I use chicken thighs instead of breasts?
Yes! Chicken thighs will produce a juicier sandwich but may require slightly longer cooking time. Make sure they’re pounded to an even thickness.
What makes a chicken parm sub different from a chicken parm sandwich?
The terms are often used interchangeably, but typically a “sub” uses a longer, submarine-style roll, while a sandwich might use round rolls or sliced bread. The fillings remain the same.
Looking for a Delicious Twist on Chicken Parm?
Love this chicken parm sandwich? Don’t miss my creamy Chicken Parmesan with Alfredo Sauce recipe! It transforms the classic dish with rich, garlicky alfredo instead of marinara for an indulgent dinner that will impress everyone at your table. Perfect for when you want to elevate your chicken parmesan game!
Print
Ultimate Chicken Parmesan Sandwich
- Prep Time: 20 minutes
- Cook Time: 30 minutes
- Total Time: 50 minutes
- Yield: 4 servings 1x
- Category: Main Course
- Method: Frying and Broiling
- Cuisine: Italian-American
- Diet: Gluten-Free Option
Description
A masterclass in achieving the perfect crispy chicken, tangy sauce, and melty cheese in a delicious chicken parmesan sandwich.
Ingredients
- 2 boneless, skinless chicken breasts (about 1 pound/450g)
- 1 cup (120g) all-purpose flour
- 1 teaspoon garlic powder
- 1 teaspoon salt
- ½ teaspoon black pepper
- 3 large eggs
- 2 tablespoons milk
- 1½ cups (150g) panko breadcrumbs
- ½ cup (50g) Italian seasoned breadcrumbs
- ½ cup (50g) grated Parmesan cheese
- 1 teaspoon dried oregano
- 1 tablespoon fresh parsley, finely chopped
- Vegetable or canola oil for frying (about 2 cups/480ml)
- 1 cup (240ml) high-quality marinara sauce
- 8 slices fresh mozzarella cheese (about 8oz/225g)
- ¼ cup (25g) freshly grated Parmesan cheese
- 4 Italian sandwich rolls or ciabatta rolls
- 2 tablespoons butter, softened
- 2 cloves garlic, minced
- 1 tablespoon fresh basil, chopped (for garnish)
- Red pepper flakes (optional, for heat)
Instructions
- Butterfly the chicken breasts and pound to ½-inch thickness. Season with salt and pepper.
- Set up your breading station with flour mixture, egg wash, and breading mixture.
- Dredge each chicken piece in flour, dip in egg wash, and press into breadcrumbs for double coating.
- Let the breaded chicken rest for 10 minutes.
- Heat oil to 350°F (175°C) and fry the chicken for 3-4 minutes on each side until golden brown. Drain on a wire rack.
- Preheat the broiler and prepare the bread by toasting on the cut sides with garlic butter for 1-2 minutes.
- Assemble the sandwiches with fried chicken, marinara sauce, mozzarella, and Parmesan, then broil until cheese is melted.
- Garnish with fresh basil, cut sandwiches in half, and serve.
Notes
For variations, try baked or air fryer versions for a lighter option. Keep fried chicken and sauce separate until ready to serve to prevent sogginess.
Nutrition
- Serving Size: 1 sandwich
- Calories: 650
- Sugar: 6g
- Sodium: 900mg
- Fat: 30g
- Saturated Fat: 12g
- Unsaturated Fat: 14g
- Trans Fat: 0g
- Carbohydrates: 65g
- Fiber: 3g
- Protein: 40g
- Cholesterol: 240mg

Comments and Reviews
Comments are closed.